AI助手支持GPT4.0
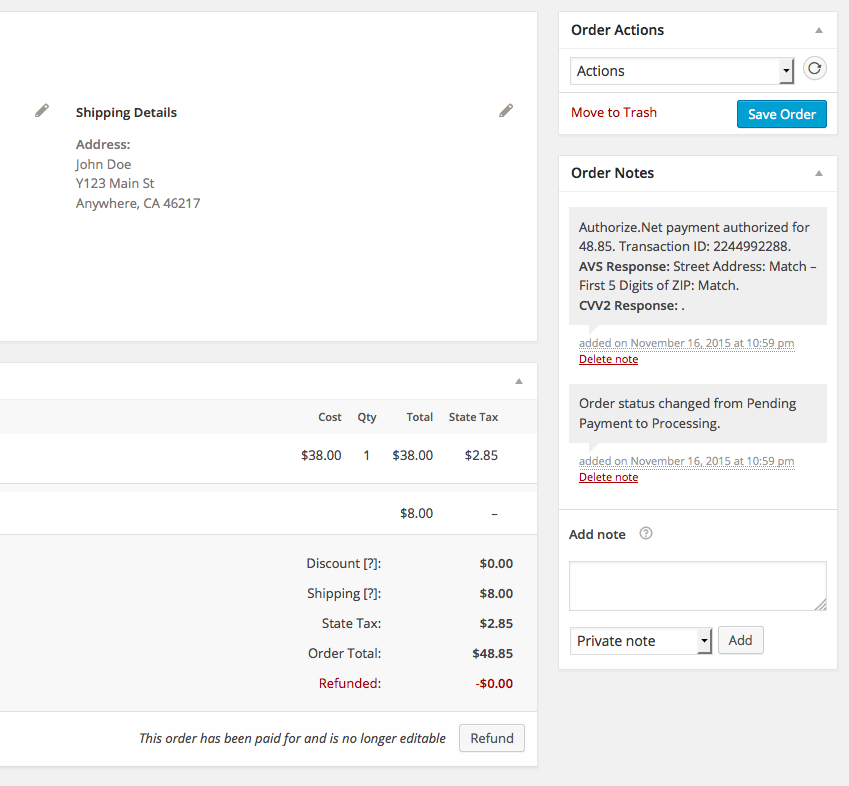
The Authorize.Net CIM for WooCommerce plugin adds Authorize.Net as a payment method to your WooCommerce store.
WooCommerce的Authorize.Net CIM插件将Authorize.Net作为付款方式添加到您的WooCommerce商店。
Authorize.Net makes accepting credit cards simple.
Authorize.Net使接受信用卡变得简单。
Accept all major credit cards including Visa, MasterCard, American Express, Discover, JCB, and Diners Club.
接受所有主要信用卡,包括Visa,MasterCard,American Express,Discover,JCB和Diners Club。
The Authorize.Net extension allows your logged in
Authorize.Net扩展名允许您登录
customers to securely store and re-use credit card profiles to speed up the checkout process.
客户可以安全地存储和重复使用信用卡资料,从而加快结帐流程。
We also support all Subscription and Pre-Order features.
我们还支持所有订阅和预订功能。
An Authorize.Net Gateway Account and Merchant Account is required.
需要Authorize.Net网关帐户和商户帐户。
Your Authorize.Net Gateway must have Customer Information Manager (CIM)
您的Authorize.Net网关必须具有客户信息管理器(CIM)
enabled for the stored credit card, subscription, and pre-orders features to work.
已启用,以使存储的信用卡,订阅和预订功能正常工作。
We are the largest Authorize.Net reseller in the United States and can set up your Authorize.Net gateway and merchant account for only $10 per month with
我们是美国最大的Authorize.Net经销商,可以通过每月仅$ 10的价格设置Authorize.Net网关和商家帐户。
no set-up fees.
没有安装费。
This includes Customer Information Manager (CIM), Automated Recurring Billing (ARB), and Advanced Fraud Detection Suite.
这包括客户信息管理器(CIM),自动重复计费(ARB)和高级欺诈检测套件。
Our merchant
我们的商人
processing rates are the lowest in the industry.
处理率是业界最低的。
Click Here to Sign Up!
单击此处进行注册!
Automatic installation is the easiest option as WordPress handles the file transfers itself and you don’t need to leave your web browser.
自动安装是最简单的选项,因为WordPress会自行处理文件传输,因此您无需离开网络浏览器。
To do an automatic install,
要自动安装,
follow these directions:
请遵循以下指示:
uthorize.net CIM for WooCommerce
从插件页面
uthorize.net CIM Complete the configuration by navigating to WooCommmerce -> Settings -> Checkout -> Authorize.Net CIM通过导航到WooCommmerce->“设置”->“结帐”->“ Authorize.Net CIM”来完成配置
/wp-content/plugins/
/ wp-content / plugins / 目录Activate Authorize.net CIM for WooCommerce from the Plugins page从插件页面为WooCommerce激活 Authorize.net CIM Complete the configuration by navigating to WooCommmerce -> Settings -> Checkout -> Authorize.Net CIM通过导航到WooCommmerce->“设置”->“结帐”->“ Authorize.Net CIM”来完成配置
Authorize.net CIM for WooCommerce
Authorize.net CIM Complete the configuration by navigating to WooCommmerce -> Settings -> Checkout -> Authorize.Net CIM通过导航到WooCommmerce->“设置”->“结帐”->“ Authorize.Net CIM”来完成配置
原文出处:http://www.sanshu.cn/a/3089.html
群主管理都是支付大佬