AI助手支持GPT4.0
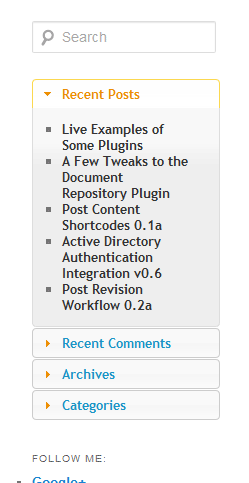
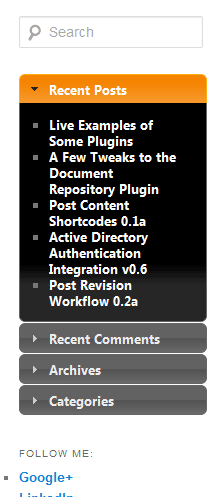
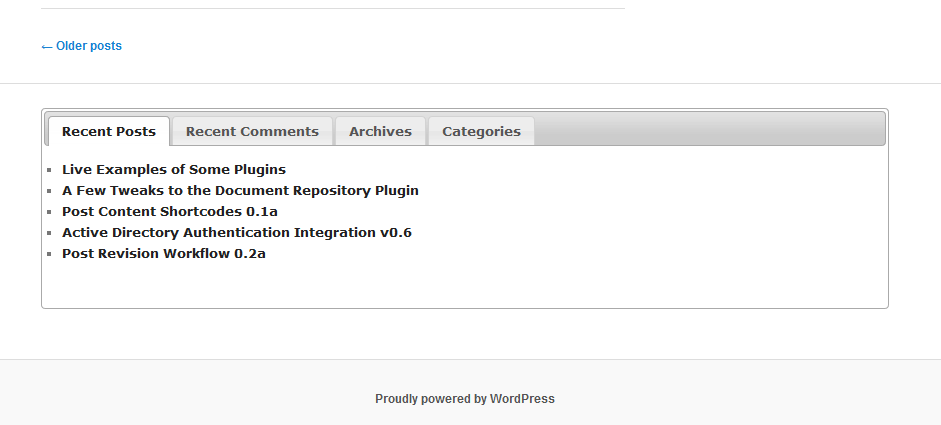
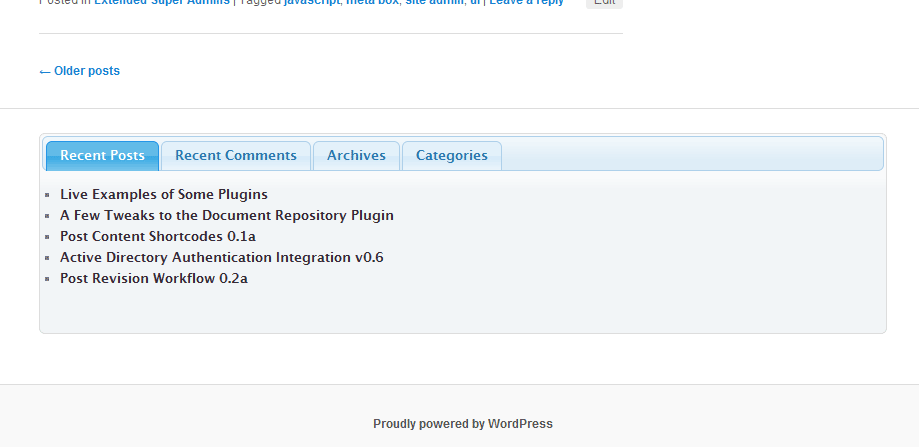
This plugin allows you to combine multiple widgets into a single tabbed/accordion-style interface in your theme.
此插件可让您将多个小部件组合到主题中的单个选项卡式/手风琴式界面中。
To use this plugin, simply drag widgets into the “Collapsible Widget Area” widget area in Appearance -> Widgets within your admin area.
要使用此插件,只需将窗口小部件拖到管理区域内“外观”->“窗口小部件”中的“可折叠窗口小部件区域”窗口小部件区域即可。
Once you’ve done that, reload the Appearance -> Widgets page and drag the Collapsible Widget into the sidebar in which you want it to appear.
完成此操作后,请重新加载外观->小部件页面,然后将可折叠小部件拖到您希望其出现的侧栏中。
Do not drag a “Collapsible Widget” into any of the existing “Collapsible Widget Area” sidebars.
不要将“可折叠小部件”拖动到任何现有的“可折叠小部件区域”侧栏中。Options选项Within the Collapsible Widget itself, you can specify whether you want to use a Tab interface or an Accordion interface.在“可折叠小部件”本身中,您可以指定要使用Tab界面还是手风琴界面。Under Settings -> Collapsible Widget Options, you can choose the jQueryUI theme you want to apply to the collapsible widget container.在“设置”->“可折叠小部件选项”下,您可以选择要应用于可折叠小部件容器的jQueryUI主题。All of the included jQueryUI themes are hosted on Google’s CDN.所有包含的jQueryUI主题都托管在Google的CDN中。If you already have a jQueryUI theme included in your WordPress theme, you can choose “None” from the option selector, and no extra stylesheet will be included for this widget.如果您的WordPress主题中已经包含jQueryUI主题,则可以从选项选择器中选择“无”,并且此小部件将不包含任何额外的样式表。If you want to include your own jQueryUI theme, there are two ways you can do so:如果要包括自己的jQueryUI主题,可以采用两种方法:Use the collapsible-widget-ui-theme filter to specify the exact URI of the stylesheet you want to include.使用collapsible-widget-ui-theme过滤器指定要包含的样式表的确切URI。Use the collapsible-widget-theme-list filter to add or remove items from the list of available themes.使用collapsible-widget-theme-list过滤器在可用主题列表中添加或删除项目。The parameter sent through this filter is an associative array of the available themes.通过此过滤器发送的参数是可用主题的关联数组。If the theme is hosted on Google's CDN, just the keyword is needed as the array key (for instance, the keyword for the “UI Lightness” theme is “ui-lightness” and the keyword for the “Base” theme is “base”如果该主题托管在Google的CDN上,则仅需要关键字作为数组键(例如,“ UI Lightness”主题的关键字为“ ui-lightness”,而“ Base”主题的关键字为“ base” ).)。If the theme is hosted elsewhere, the entire URI to the stylesheet should be used as the array key.如果主题在其他地方托管,则应将样式表的整个URI用作数组键。The array value should be the human-readable name of the theme.数组值应该是主题的可读名称。Under Settings -> Collapsible Widget Options, you can specify how many separate Collapsible Widget Areas should be available within Appearance -> Widgets.在设置->可折叠小部件选项下,您可以指定外观->小部件中应该有多少个单独的可折叠小部件区域可用。
All of the included jQueryUI themes are hosted on Google’s CDN.
所有包含的jQueryUI主题都托管在Google的CDN中。
If you already have a jQueryUI theme included in your WordPress theme, you can choose “None” from the option selector, and no extra stylesheet will be included for this widget.
如果您的WordPress主题中已经包含jQueryUI主题,则可以从选项选择器中选择“无”,并且此小部件将不包含任何额外的样式表。
If you want to include your own jQueryUI theme, there are two ways you can do so:
如果要包括自己的jQueryUI主题,可以采用两种方法:
The parameter sent through this filter is an associative array of the available themes.
通过此过滤器发送的参数是可用主题的关联数组。
If the theme is hosted on Google's CDN, just the keyword is needed as the array key (for instance, the keyword for the “UI Lightness” theme is “ui-lightness” and the keyword for the “Base” theme is “base”
如果该主题托管在Google的CDN上,则仅需要关键字作为数组键(例如,“ UI Lightness”主题的关键字为“ ui-lightness”,而“ Base”主题的关键字为“ base”
).
)。
If the theme is hosted elsewhere, the entire URI to the stylesheet should be used as the array key.
如果主题在其他地方托管,则应将样式表的整个URI用作数组键。
The array value should be the human-readable name of the theme.
数组值应该是主题的可读名称。
The easiest way to install this plugin automatically from within your administration area.
从管理区域自动安装此插件的最简单方法。
If that doesn’t work, or if you prefer to install it manually, you have two options.
如果这不起作用,或者您希望手动安装,则有两个选择。
Upload the ZIP
上传ZIP Download the ZIP file from the WordPress plugin repository.从WordPress插件存储库下载ZIP文件。Go to Plugins -> Add New -> Upload in your administration area.转到插件->添加新->在管理区域中上传。Click the “Browse” (or “Choose File”) button and find the ZIP file you downloaded.单击“浏览”(或“选择文件”)按钮,找到您下载的ZIP文件。Click the “Upload” button.点击“上传”按钮。Go to the Plugins dashboard and “Activate” the plugin (for MultiSite users, you can safely “Network Activate” this plugin).转到“插件”面板并“激活”插件(对于MultiSite用户,您可以安全地“网络激活”此插件)。FTP Installation FTP安装 Download the ZIP file from the WordPress plugin repository.从WordPress插件存储库下载ZIP文件。Unzip the file somewhere on your harddrive.将文件解压缩到硬盘驱动器上的某个位置。FTP into your Web server and navigate to the /wp-content/plugins directory.通过FTP进入您的Web服务器,然后导航至/ wp-content / plugins目录。Upload the collapsible-widget-area folder and all of its contents into your plugins directory.将collapsible-widget-area文件夹及其所有内容上传到您的插件目录中。Go to the Plugins dashboard and “Activate” the plugin (for MultiSite users, you can safely “Network Activate” this plugin).转到“插件”面板并“激活”插件(对于MultiSite用户,您可以安全地“网络激活”此插件)。Must-Use Installation必须使用的安装If you would like to force this plugin to be active (generally only useful for Multi Site installations) without an option to deactivate it, you can upload the contents of the collapsible-widget-area folder如果您想强制该插件处于活动状态(通常仅用于多站点安装),而没有停用该插件的选项,则可以上传collapsible-widget-area文件夹的内容to your /wp-content/mu-plugins folder.到/ wp-content / mu-plugins文件夹。If that folder does not exist, you can safely create it.如果该文件夹不存在,则可以安全地创建它。
FTP Installation
FTP安装 Download the ZIP file from the WordPress plugin repository.从WordPress插件存储库下载ZIP文件。Unzip the file somewhere on your harddrive.将文件解压缩到硬盘驱动器上的某个位置。FTP into your Web server and navigate to the /wp-content/plugins directory.通过FTP进入您的Web服务器,然后导航至/ wp-content / plugins目录。Upload the collapsible-widget-area folder and all of its contents into your plugins directory.将collapsible-widget-area文件夹及其所有内容上传到您的插件目录中。Go to the Plugins dashboard and “Activate” the plugin (for MultiSite users, you can safely “Network Activate” this plugin).转到“插件”面板并“激活”插件(对于MultiSite用户,您可以安全地“网络激活”此插件)。Must-Use Installation必须使用的安装If you would like to force this plugin to be active (generally only useful for Multi Site installations) without an option to deactivate it, you can upload the contents of the collapsible-widget-area folder如果您想强制该插件处于活动状态(通常仅用于多站点安装),而没有停用该插件的选项,则可以上传collapsible-widget-area文件夹的内容to your /wp-content/mu-plugins folder.到/ wp-content / mu-plugins文件夹。If that folder does not exist, you can safely create it.如果该文件夹不存在,则可以安全地创建它。
If you would like to force this plugin to be active (generally only useful for Multi Site installations) without an option to deactivate it, you can upload the contents of the collapsible-widget-area folder
如果您想强制该插件处于活动状态(通常仅用于多站点安装),而没有停用该插件的选项,则可以上传collapsible-widget-area文件夹的内容to your /wp-content/mu-plugins folder.到/ wp-content / mu-plugins文件夹。If that folder does not exist, you can safely create it.如果该文件夹不存在,则可以安全地创建它。
to your /wp-content/mu-plugins folder.
到/ wp-content / mu-plugins文件夹。
If that folder does not exist, you can safely create it.
如果该文件夹不存在,则可以安全地创建它。
原文出处:http://www.sanshu.cn/a/7862.html
群主管理都是支付大佬